
12 Feb 2010:
mcmcgoo asked:
Great game. I wanted to ask you if there was any way to create a custom character, level etc in the client admin version with the server running on my computer, or any tips or commands you have for it. Also, is there a way to easily configure this version so I can connect to the server running on my computer on another computer over the internet? Thanks for your help!
Short answer to both: Yes!
The Administrator Console
To the first, there are various commands available via the admin console. However, to access them you’ll need to be logged into a admin character on the server. There is only one way to do this: you have to manually edit the server’s SQLite database.
Download the SQLite Database Browser and use it to open up the ‘evidyon.sqldb’ file. Go to the “browse data” tab and pick the “characters” table from the drop-down menu as below:
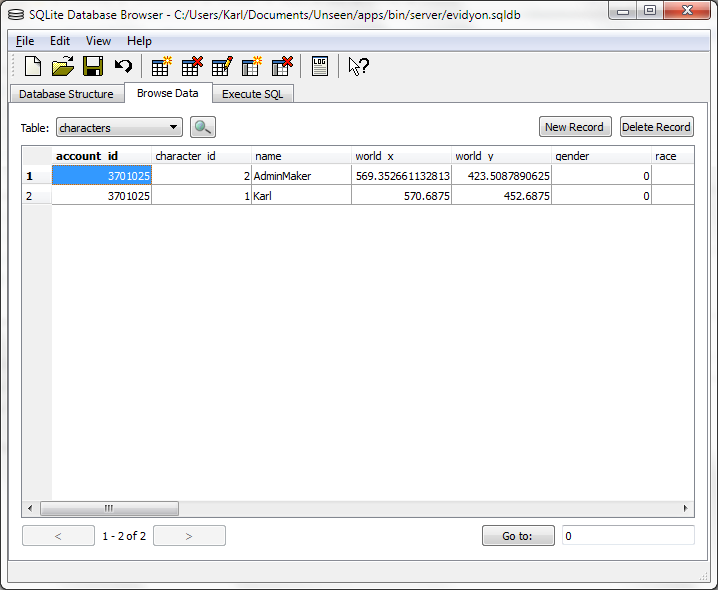
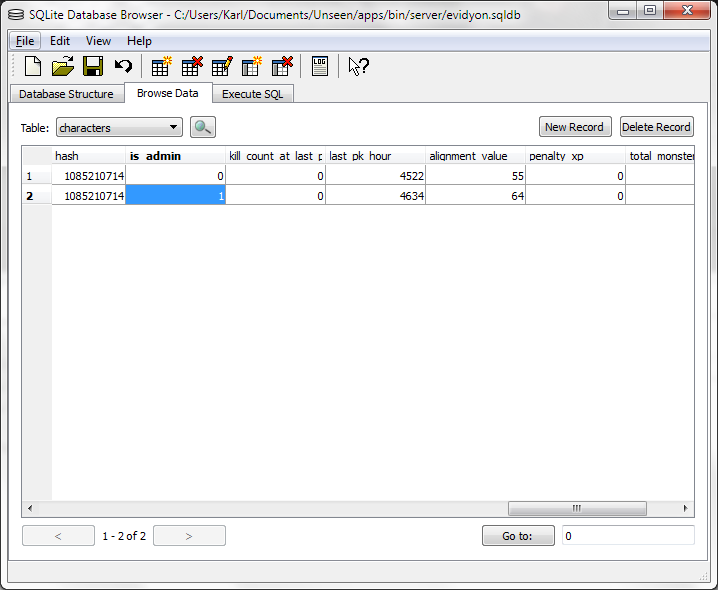
Next, pick the row containing the character you want to make an administrator. Scroll right to the is_admin column and set the value to 1. Finally, save the database.
Of course, you could make any adjustments to characters that you want from here–changing levels, stats, etc. However, this would require the server to restarted every time you want to adjust something. Keep reading to find out how to do more via the admin console.
Now, when you log into this character you will notice that the character’s name and spoken text is green. If this is so, the admin console will be functional.
Each instruction is used by entering “COMMAND > PARAMETERS.” into the admin console. Below are some of the commands:
sql>QUERY
Executes an SQL query on the database to make modifications.
create item>item name
Gives your character a new (legit!) item of any kind–just type the name.
exit>
Closes the Evidyon client
backup>
Forces the server to run a backup routine immediately
turn off server>
Does exactly what you would think!
online>
Returns a list of all online accounts & characters
characters> account#
Displays a list of every character on the account number entered as the parameter.
Running an Internet-Accessible Server
This is fairly simple if you are not behind a router. Go to no-ip.org and sign up for a domain. Install the client on the same computer where you’ll be running the server. This associates your IP address with some host name so that people can connect to “yourserver.no-ip.org” instead of an IP address. It’s important to do this because non-dedicated IP addresses (anything at home!) change every so often, and it keeps people from having to constantly update their config file.
To allow people to connect, have them enter your host name (yourserver.no-ip.org) into the Server1= line of the config.ini client configuration file.
Now, if you are behind a router there is one more step: forwarding packets to the computer where you are running the server. Log into your router by typing in its IP address in your web browser (usually 192.168.0.1, but it varies by maker) and it will have a section where you can set up port forwarding.
You’ll need the IP address of the computer where you are running the server. Usually there are connection logs in the router’s admin area where you can pick this information up. If not, just open up a console window on the server computer, type “ipconfig” and read off the IP address. It should be something like 192.168.0.4.
Back in the router admin port forwarding page, tell the router to send UDP packets on port 12601 to the IP address of the server computer. Once that’s done, launch server.exe and you’re ready to go!